
Free Safe Operating Procedure (Isolation Signage Setup) Template
Clearly define the steps for setting up isolation signage with our free template. Download the customisable DOCX to standardise your safety procedures.
Free Safe Operating Procedure (Isolation Signage Setup) Template
DOCX • 126 KB + PDF
Updated Oct 2026
No signup required
Purpose of the Free Safe Operating Procedure (Isolation Signage Setup) Template
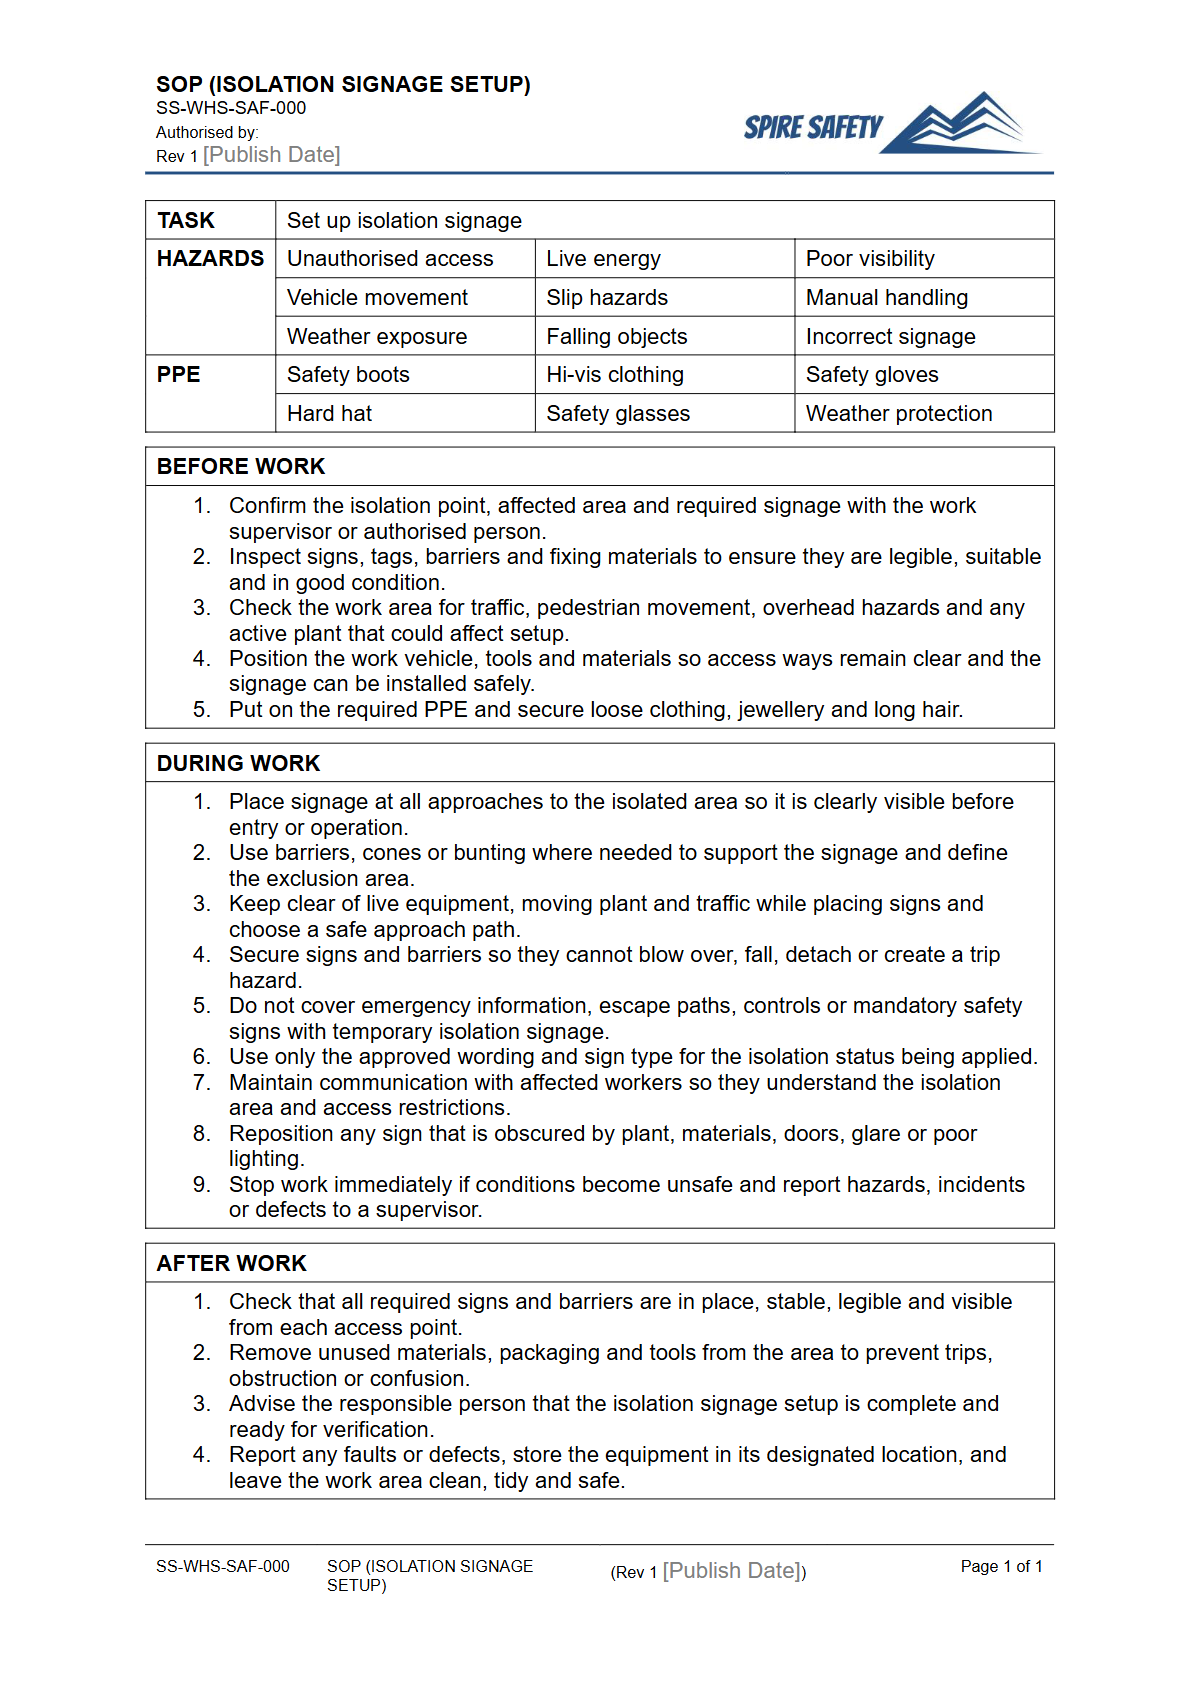
Effectively communicating the status of isolated equipment is a critical control measure in preventing accidental startup and protecting workers from harm. This Free Safe Operating Procedure (Isolation Signage Setup) Template provides a clear, step-by-step guide for workers to follow when preparing and installing isolation signage for plant, equipment, or work areas.
Using this SOP helps standardise your process, ensures all necessary steps are considered, and clearly communicates hazards to everyone on site. It forms a vital component of a broader isolation or lockout/tagout (LOTO) program, reinforcing safe work behaviours.
A well-documented procedure is a cornerstone of workplace safety, demonstrating a commitment to risk management. This template provides a structured starting point for developing procedures that integrate into your comprehensive WHS management systems, ensuring a consistent approach to controlling hazardous energy across your organisation.
Video walkthrough
How to use the Free Safe Operating Procedure (Isolation Signage Setup) Template
This Safe Operating Procedure is provided as a fully editable DOCX file, allowing for easy customisation, and a PDF for quick reference. After downloading, review each section and adapt the content to suit the specific requirements of your workplace, including the types of machinery you use, the energy sources present, and your company's established safety protocols.
Involve your team in the review process to ensure the procedure is practical and understood by those who will be using it.
IMPORTANT: This is a template only. We have provided a solid foundation based on Australian WHS principles, but it is essential that you customise this document to reflect the specific equipment, personnel, and unique risks of your workplace.
You must consult with your team and conduct your own risk assessments to ensure its suitability. For other equipment-specific procedures, you might adapt a resource like our free Conveyer System SOP to fit your needs.
When to use it
This Safe Operating Procedure should be implemented whenever a worker needs to apply isolation signage to plant, equipment, or a defined area. The primary goal is to warn others that the equipment must not be operated. This typically occurs in situations such as:
- Before performing maintenance, cleaning, or repairs on machinery.
- When a piece of equipment has been found to be faulty, damaged, or unsafe to operate.
- During the process of de-energising and isolating electrical, mechanical, hydraulic, or other energy sources.
- When setting up a restricted work area where unauthorised entry could lead to harm.
Adherence to this SOP should be verified through job observations and regular WHS compliance auditing to ensure the process is being followed correctly every time.
Who should use it
This procedure should only be performed by workers who are trained, competent, and explicitly authorised to apply isolation signage and manage energy controls. This may include:
- Qualified tradespeople (e.g., electricians, mechanics).
- Maintenance personnel and service technicians.
- Authorised equipment operators involved in cleaning or setup.
- Supervisors or team leaders responsible for overseeing maintenance tasks.
Competency is key. Workers must understand the types of hazards they are controlling, the specific function of different signs (e.g., 'DANGER', 'OUT OF SERVICE'), and the exact steps required by your site's isolation procedure.
Following a documented process, such as this Air Compressor SOP for specific machinery, is a key part of demonstrating competence.
What is included in the template?
Our template offers a structured layout to guide your documentation. It includes sections for identifying potential hazards, listing necessary personal protective equipment (PPE), and detailing a logical sequence of actions. Key steps covered include:
- Preparation: Assessing the equipment and work area, and gathering the correct signage (e.g., danger tags, out of service tags).
- Notification: Informing all affected personnel about the planned isolation.
- Application: Securely attaching signs at all operator controls and energy isolation points.
- Verification: A final check to ensure signs are clear, visible, and correctly placed.
- Removal: The process for removing signage once work is complete and the equipment is safe to return to service.
For more complex tasks involving heavy mobile plant, a more detailed risk assessment and procedure is necessary, which might draw on principles found in documents like our Trencher SOP template.
By methodically addressing each of these stages, you create a robust procedure that minimises the risk of error and protects your team. To discover more templates and checklists, browse our complete free WHS resources library.
Common mistakes
Common mistakes to avoid
- Using generic, non-specific signage that doesn't clearly state the hazard or reason for isolation.
- Failing to remove signs and any associated locks immediately after work is completed and the equipment is safe.
- Not training all relevant workers on the meaning and importance of different isolation signs used on site.
- Placing signs where they are not clearly visible or can be easily missed by someone approaching the equipment.
Legal references
Legal considerations
The following legal requirements may be relevant to this type of work.
- Work Health and Safety Act (Harmonised) — Provides the primary duties for protecting workers and other people from work health and safety risks.
- Work Health and Safety Regulations (Harmonised) — Sets out requirements supporting the management of workplace hazards and risks.
The following codes may be relevant to this type of work.
- Managing WHS Risks Code of Practice — Provides practical guidance on identifying hazards, assessing risks and applying effective controls.
- Work Health and Safety Consultation, Cooperation and Coordination Code of Practice — Provides practical guidance on consulting workers and coordinating with other duty holders.
- Managing the Work Environment and Facilities Code of Practice — Provides practical guidance on safe work environments, workplace facilities and related controls.
Did you know
Danger vs. Warning
On Australian safety signs, the word 'DANGER' indicates an imminently hazardous situation that, if not avoided, will result in death or serious injury. 'WARNING' indicates a potentially hazardous situation that could result in death or serious injury.
FAQ
Frequently asked questions
01What is the difference between a Safe Work Method Statement (SWMS) and a Safe Operating Procedure (SOP)?
02Does this template cover lockout/tagout (LOTO) procedures?
03Who is responsible for setting up isolation signage at a workplace?
04How often should isolation procedures be reviewed?
Share this resource
Free Safe Operating Procedure (Isolation Signage Setup) Template
Browse Categories
How To Use It
- 1Download and open in Word or PDF.
- 2Replace the placeholders with your business details.
- 3Get it reviewed by a WHS specialist before rollout.
Need it customised?
Our WHS consultants can adapt this template to your site, run a gap analysis, or audit what you already have in place.
Book a Free Consultation WHS consulting servicesor call 1300 156 382
Related templates
- Free Safe Operating Procedure (Jackhammer) Template
- Free Safe Operating Procedure (Jaw Crusher Clearing) Template
- Free Safe Operating Procedure (Jet Blast Area Entry) Template
- Free Safe Operating Procedure (Jet Bridge Cleaning) Template
- Free Safe Operating Procedure (Jet Ski Operation) Template
- Free Safe Operating Procedure (Jib Crane) Template